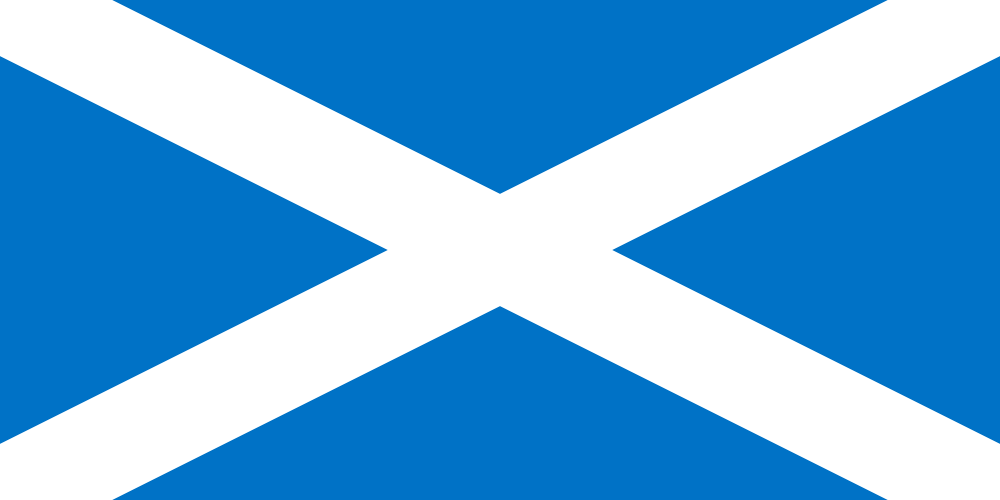
It has nothing to do with salt, tires or salty language. A saltire is the diagonal cross used in many flag designs, including the flags of Scotland and Jamaica.
I first learned about saltires (and their use in flag designs) while searching for an simple way to divide a rectangle into matching pairs of triangles. This tutorial might not be as entertaining as Sheldon Cooper’s “Fun with Flags” videos (from The Big Bang Theory), but you’ll find out a a few flag facts and learn how to create an easily customizable saltire flag.
An important note about flag dimensions…
Flag dimensions are different from Adobe Illustrator document dimensions. For example, a 500 pixel height x 1000 pixel width Illustrator document is described in flag nomenclature as 500 pixel width (hoist) x 1000 pixel length (fly). It is confusing to see the word “width” used in two different ways. Here’s a quick reference to help keep things clear:
height x width = Illustrator
width x length = Flag
Flags are produced in a variety of aspect ratios. Two common aspect ratios are 1:2 and 2:3 (width:length). Scotland uses both ratios, so we’ll look at how to create each one.
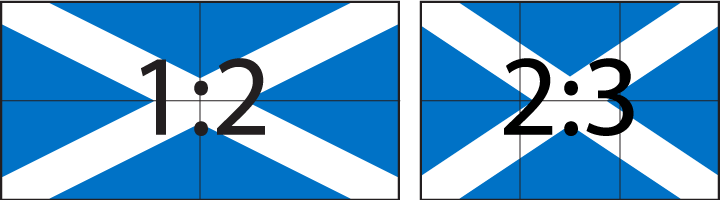
We’ll begin by creating the flag of Scotland using a 1:2 aspect ratio (500 pixels x 1000 pixels). Once that flag is complete, you’ll have the option to also create a flag of Jamaica. Then we’ll look at the adjustments required to create a 2:3 aspect ratio (500 pixels x 750 pixels) flag .
- Part 1: Create a Flag of Scotland (1:2 Aspect Ratio)
- Option: Create a Flag of Jamaica
- Part 2: Create a Flag of Scotland (2:3 Aspect Ratio)
NOTE: This tutorial was created using Adobe Illustrator CC 2015.
Part 1: Create a Flag of Scotland (1:2 Aspect Ratio)
Step 1
Create a new document that uses pixels as the measurement unit and set its dimensions to 500 pixels in height and 1000 pixels in width. In Illustrator Preferences, set General and Stroke units to pixels.
Step 2
Draw a rectangle that matches your document artboard dimensions.
- Set stroke color to “none” and fill color to blue. Most specifications for the flag of Scotland recommend Pantone 300. These are the RGB and hex values for Pantone 300: RGB (hex) 0, 114, 198 (#0072C6).
- Using the Rectangle Tool (M), click once on the artboard.
- This calls up the Rectangle Options dialog. Input width: 1000 px and height: 500 px and press OK.
- Using the Align panel, set Align To: to Align to Artboard
- Press the Horizontal Align Center and Vertical Align Center buttons on the Align panel.
- The blue rectangle should now cover your artboard.
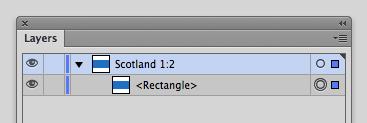
- Using the Layers panel, rename the layer holding your rectangle “Scotland 1:2”.
Step 3
Use the Line Segment Tool (\) to divide the rectangle into four triangular areas.
- Turn on Smart Guides (View > Smart Guides) and Snap to Point (View > Snap to Point). These two features will help you precisely position your line segments.
- Deselect the rectangle by either holding down Cmd (Mac) or Control (PC) and clicking on the canvas outside the artboard, or Select > Deselect (Shift+Cmd/Control-A) before clicking the triangle.
- Switch to the Line Segment Tool (\)
- Hover the Line Segment Tool crosshair over the rectangle’s lower left corner. When the word “anchor” appears, click and drag towards the upper right corner anchor point. Hover over the anchor and release the line segment when the word “anchor” appears.
- With the line segment still selected, double-click on the Reflect Tool (O).
- This calls up the Reflect Options dialog. Select Vertical axis and press Copy.
- It won’t be visibly apparent, but there are now two diagonal line segments crossing your rectangle. You should see the line segments and the rectangle in your Layers panel.
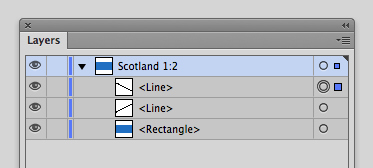
- Using the Layers panel, select both line segments. The first line segment should already be selected. Hold Shift and click the second line segment’s target selector button. If both line segments are properly selected you’ll see a colored indicator to the right of each button.
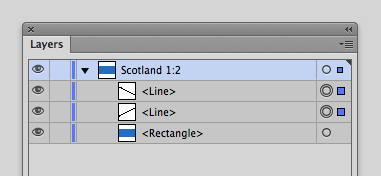
- Group (Cmd/Control-G) the line segments.
Step 4
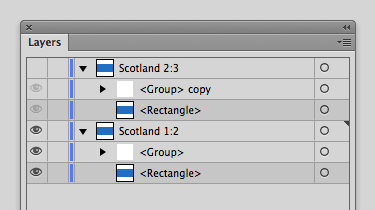
Duplicate the Scotland 1:2 layer, so that it can be used later on to create the 2:3 aspect ratio flag.
- Using the Layers panel, select the “Scotland 1:2” layer.
- Click the Layers panel options menu button (upper right) and select Duplicate “Scotland 1:2”.
- Rename the duplicate “Scotland 2:3.” Turn off visibility to the duplicate layer, so that it won’t be affected by changes we make to Scotland 1:2.
Step 5
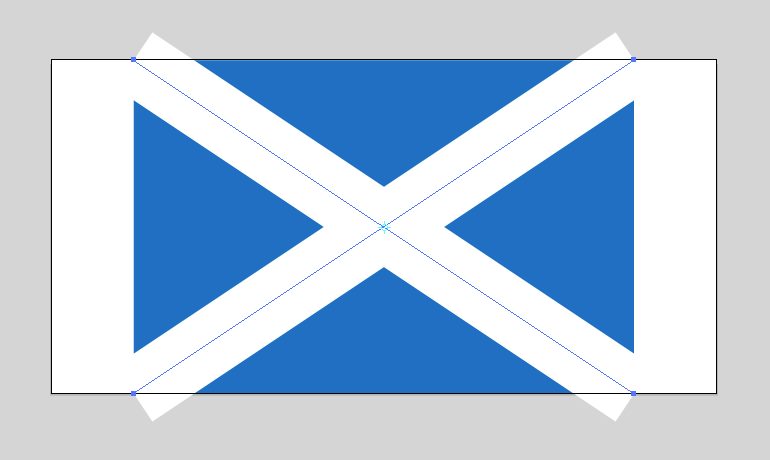
Return to the “Scotland 1:2” layer. The flag of Scotland uses a white saltire whose width is one-fifth the flag width. Our flag uses a 500 pixel width, so we will create a white saltire that is 100 pixels wide.
- Using the Layers panel, select the “<Group>” layer (containing the two diagonal line segments).
- Change the stroke color to white and change the stroke weight to 100 pixels.

Step 6
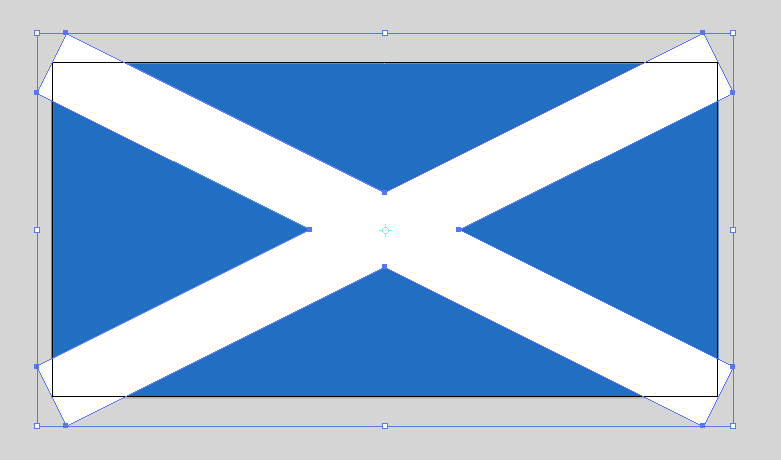
The line segments now have the correct appearance, but we need to turn these 100 pixel wide strokes into shapes whose outer dimensions match their appearance. To make this happen we will expand the strokes into two diagonal bars and then combine those bars into a single saltire shape.
- Object > Expand, press OK. The strokes are expanded into two diagonal bar shapes.
- Using the Pathfinder panel (Window > Pathfinder), press the Unite (or Merge) button. The two diagonal bars are combined into a single saltire shape.
Step 7
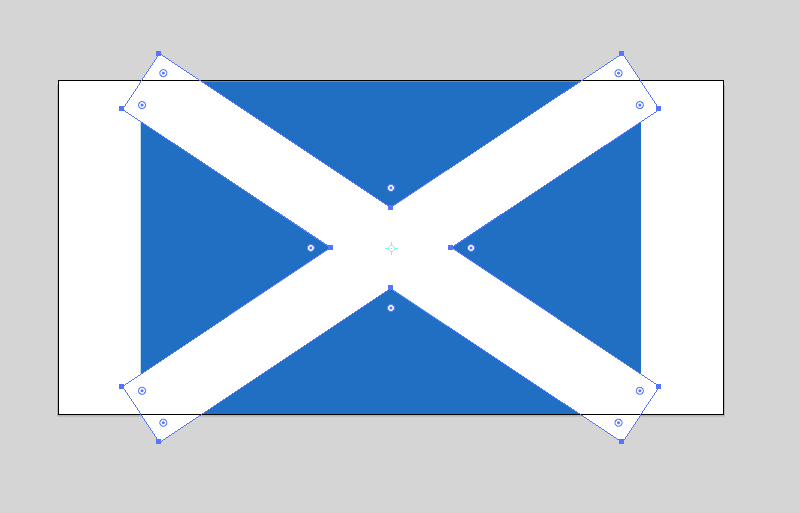
Create separate objects by using the Pathfinder panel with the saltire shape and the blue rectangle.
- Select all (Cmd/Control-A) of the objects in the “Scotland 1:2” layer.
- Using the Pathfinder panel (Window > Pathfinder), press the Divide button. Divide splits everything into separate objects (nine, to be exact).
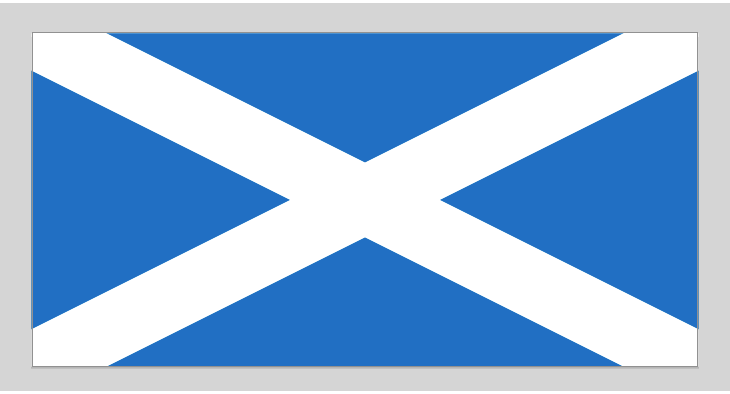
- Using the Direct Selection Tool (A), click and drag across the middle of the artboard to select only the objects on the artboard (do not select the parts of the saltire that fall outside the artboard).
- Select > Inverse. This selects the parts of the saltire that extend beyond the artboard.
- Press Delete.
Step 8
The flag of Scotland is now complete. Using the Direct Selection Tool (A), you can click on the art and move pieces around to see that there are now four blue triangles and a single white saltire. These separate objects can be recolored and further divided by using the Pathfinder tool to create your own custom flags.
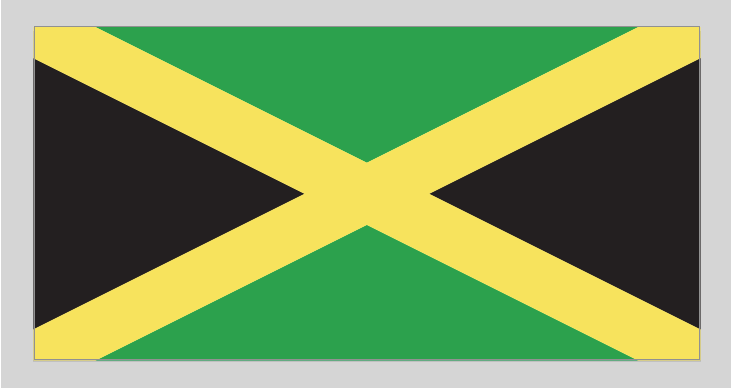
OPTION: Create a Flag of Jamaica
Jamaica’s flag design is similar to Scotland’s. Jamaica uses a 1:2 aspect ratio; however, Jamaica uses a saltire whose width is only one-sixth the flag width. So, a 500 pixel flag width requires a 83.33 pixels wide saltire. Jamaica’s flag uses the colors, gold, green and black. Here are the color specifications for gold and green:
“Gold” Pantone 115: RGB (hex) 249, 224, 76 (#F9E04C)
“Green” Pantone 355: RGB (hex) 0, 158, 73 (#009E49)
If you want to create a Jamaican flag, just repeat the Part 1 steps while making the saltire 83.33 pixels wide and coloring the saltire gold and the triangles black and green.
Part 2: Create a Flag of Scotland (2:3 Aspect Ratio)
At a 2:3 ratio, the 500 x 1000 flag will be converted to 500 x 750. You might wonder why we can’t just duplicate the “Scotland 1:2” flag, scale it’s length to 750 pixels and be done with it? The problem with scaling everything is the saltire will scale down so that its width will no longer be 100 pixels (one-fifth the flag width). To avoid this problem we will scale our flag objects prior to expanding the line segments and applying the Pathfinder effects.
Step 1
Using the Layers panel, make the following adjustments:
- Turn off visibility for the “Scotland 1:2” layer.
- Turn on visibility for the “Scotland 2:3” layer.
Step 2
- Select all (Cmd/Control-A) of the objects in the “Scotland 2:3” layer.
- Double-click the Scale Tool (S). Select Non-Uniform and set the Horizontal value to 75% (75% of 1000 pixels will scale the flag’s horizontal dimension to 750 pixels). Leave Scale Corners and Scale Strokes & Effects unselected.
- Press OK.
Step 3
The flag of Scotland uses a white saltire whose width is one-fifth the flag width. Our flag uses a 500 pixel width, so we will create a white saltire that is 100 pixels wide.
- Using the Layers panel, select the “<Group>” layer (containing the two diagonal line segments).
- Change the stroke color to white and change the stroke weight to 100 pixels.
Step 4
The line segments now have the correct appearance, but we need to turn these 100 pixel wide strokes into shapes whose outer dimensions match their appearance. To make this happen we will expand the strokes into two diagonal bars and then combine those bars into a single saltire shape.
- Object > Expand, press OK. The strokes are expanded into two diagonal bar shapes.
- Using the Pathfinder panel (Window > Pathfinder), press the Unite (or Merge) button. The two diagonal bars are combined into a single saltire shape.
Step 5
Create separate objects by using the Pathfinder panel with the saltire shape and the blue rectangle.
- Select all (Cmd/Control-A) of the objects in the “Scotland 2:3” layer.
- Using the Pathfinder panel (Window > Pathfinder), press the Divide button. Divide splits everything into separate objects.
- Using the Direct Selection Tool (A), click and drag across the middle of the artboard to select only the objects on the artboard (do not select the parts of the saltire that fall outside the artboard).
- Select > Inverse. This selects the parts of the saltire that extend beyond the artboard.
- Press Delete.

In the screenshot above, a 50% grey background has been added to clearly display the 500 x 750 flag against the 500 x 1000 artboard. To better organize the 2:3 ratio flag (and make it easier to print and export), you can place it on its own artboard. Using the Layers panel, select the “Scotland 2:3” layer, then using the Artboards panel, select Duplicate Artboards. A new artboard will appear with just the Scotland 2:3 flag. Select the Artboard Tool (Shift-O) and change that artboard’s width from 1000 px to 750 px.

2 thoughts on “How to Create a Saltire Flag in Adobe Illustrator”
Comments are closed.