If you’ve played 3D video games you’ll recognize low poly from its blocky appearance and lack of detail. In 3D computer graphics a polygon mesh, often composed of triangles, is used to model 3D objects. The more polygons used in the mesh, the more detail can be applied to the object.
I recently watched a video that demonstrated an easily understood process for using an image to create low poly artwork in Adobe Illustrator. While playing the video I wanted to look at written instructions, but there were none available. Watching parts of the video over and over again was slowing me down, so I ended up taking my own notes and have turned them into this tutorial.
The video tutorial ID Low Poly Illustrator: 3 of 3 – The Fox by Infinite Design (Toronto) is available on YouTube. I recommend that you watch the video and use my notes as a reference.
The low poly process is easy to understand, but it does take time and patience to execute. I found it relaxing—like playing with a coloring book or applying colors to my comics. If the thought of spending hours manually rendering hundreds of triangles (and coloring each triangle, and also manually cleaning up gaps between the triangles) makes you want to scream, then this tutorial probably isn’t for you. 😉
At the end of the tutorial I’ll post a link to Image Triangulator, an app (Windows and Mac versions) that will let you quickly abstract an image as a low poly graphic. You will still need to manually define the points in the polygon mesh, but the process can be completed in minutes instead of hours. If your subject doesn’t require precise detail, this might be the tool for you. (Okay, if you must jump to the end. Just do it!)
Create a Low Poly Dog
Step 1
Create a new document using the Print profile and choose Tabloid or A3 for the paper size.
Step 2 – Choose and Place an Image
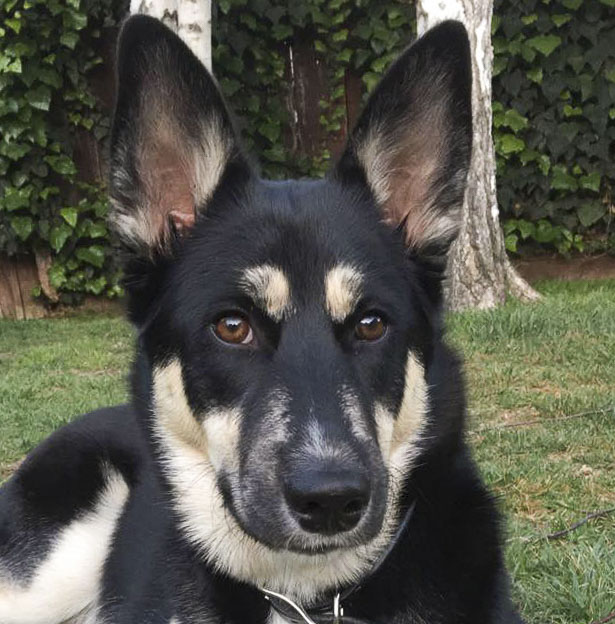
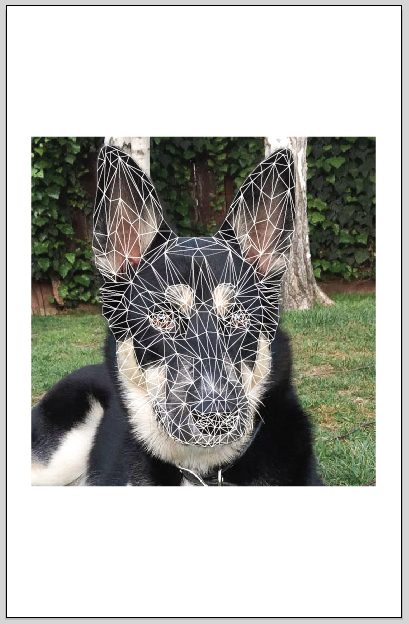
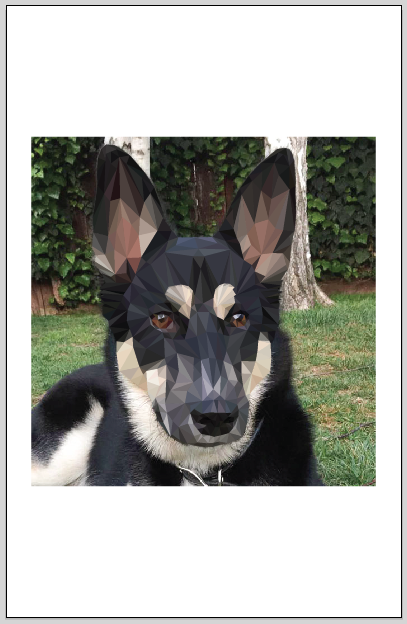
Select an image to use as the basis for your illustration. I chose a photo of my nieces’ dog (he’s also featured in one of my comics). It’s much easier to work with a photo that is a full front view, since you can create one half of the image and then reflect and copy the other half. I didn’t have access to a full front view, so I took the extra time to draw everything. The Infinite Design video tutorial demonstrates the process for creating a fox’s head based on a symmetrical full front view.
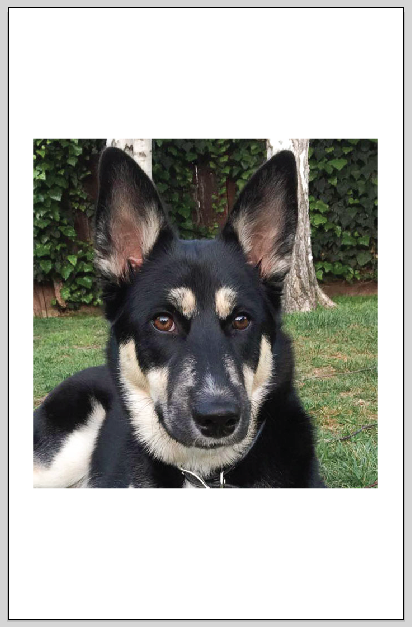
- File > Place… an image in the document.
- Using the Align panel, set Align To: to Align to Artboard.
- Press the Horizontal Align Center and Vertical Align Center buttons on the Align panel.
- Using the Select Tool (V), select the image and hold Shift-Option while dragging the image to fit comfortably within the artboard.
- Lock the image layer.
Step 3 – Polygons, Part 1
Begin creating polygons (triangles) by using the Pen Tool (P).
- Create a new layer above the image layer.
- Turn on Smart Guides (View > Smart Guides).
- Select the Pen Tool (P).
- Use a 1 point stroke weight and choose a stroke color that stands out from the image. (I used white, because my photo contained mostly darker colors.)
- Set fill color to none. (This will allow you to see your image throughout the process.)
- Use Cmd-plus (+) and minus (-) (Mac) / Ctrl-plus (+) and minus (-) (PC) to zoom in and out of your art. I spent most of my time zooming in to 300% and then back out to 100% (Cmd/Ctrl-1 also takes you to 100%).
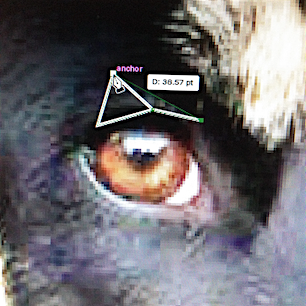
- Using the Pen Tool, single-click to set the three anchor points of your triangle. To close the triangle’s path, position the Pen Tool over the first (hollow) anchor point. When a small circle appears next to the pointer, single-click to close the path.
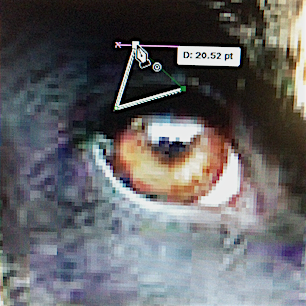
- Deselect the triangle by pressing Shift-Command-A (Mac) / Shift-Control-A (PC) and then releasing the keys. You can also deselect the triangle by pressing Command (Mac) / Control (PC) to temporarily switch to the Direct Selection Tool or Selection Tool (whichever was the last used) and clicking in an empty space.
- Begin the next triangle by positioning the Pen Tool over one of the previous triangle’s anchor points. If Smart Guides are enabled you will see the word “anchor” appear when the pointer is in position. Repeat the “four-click” process to create the triangle.
Step 4 – Polygons, Part 2
Continue creating triangles of varying sizes as you work your way around the image. You can jump around to different parts of the image or work methodically from one side to the other. I chose to start with the eyes and then continued around the face, trying to balance left and right as I worked. Try to imagine the triangles as flat pieces that you are fitting together to sculpt a 3D representation of your image.
- Align the triangles as precisely as possible by lining up adjacent triangles’ anchor points, wherever possible.
- If you decide to have an anchor sit on another triangle’s side, make sure the word “path” appears prior to creating the anchor point.
- Keep in mind that the white strokes (with their jagged extending miters) are present just so that you can see the triangles in relation to one another. Once fill color is applied, each triangle will automatically change to no stroke with only a color fill.
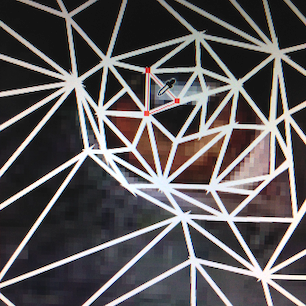
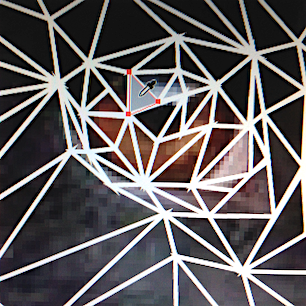
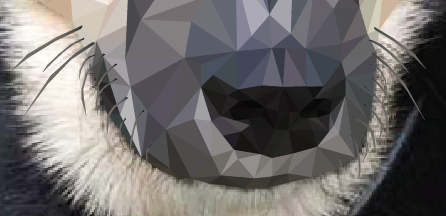
- Use larger/wider triangles to fill areas that are contain large areas of the same color and fewer details. Use smaller and/or thinner triangles in areas with greater detail. When drawing faces, the eyes, nose and mouth will contain the most detail. Keep in mind that each triangle will be filled with a different color, so you’ll want to create triangles in a pattern that matches the shape and flow of the colors throughout your subject.
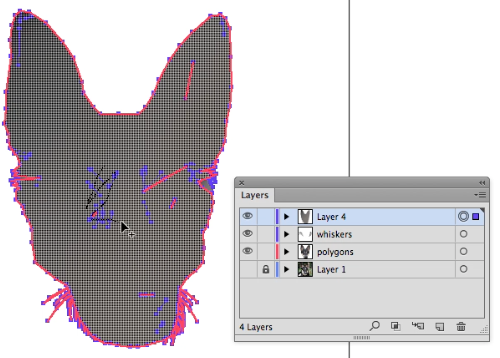
- After making hundreds of polygons, you’ll have constructed a somewhat ominous creation.
Step 5 – Applying Color
Once you have created all the polygons that will define the structure of your drawing, you are ready to begin coloring. Note, that you will probably forget to create a few triangles. Don’t worry, you can always go back in and use the pen tool to create any missing triangles.
- Using the Direct Selection Tool (A), click on a triangle’s stroke edge (there is no fill, so you can’t select the fill area of the triangle). With Smart Guides on, the triangle that you are about to select will be highlighted as you hover over its stroke edges. Depending on how the triangles were drawn you will encounter some triangles that cannot be selected because all three sides are overlapped by other triangles. Right click one of the sides and Select > Next Object Below to select the “hidden” triangle.
- Using the Eye Dropper Tool (I) click on the image to select a color for the triangle (because there is no color fill on the triangle, you will be able to click into the image). If you’re not happy with the color, undo and try again (or use the Color Picker or Color Panel to modify the color). You want to select a color that represents the area covered by the triangle. If you are within a larger area with similar colors, you’ll want neighboring triangles to use colors that stand apart from each other while still remaining cohesive. Without some contrast, the triangles will blend into each other and the polygons won’t effectively display the form and shape of your subject.
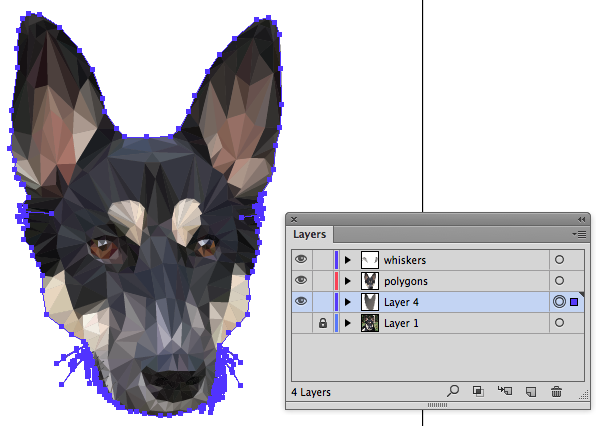
- The completed coloring looks like this:
Step 6 – Fixing Gaps Between Polygons
After applying color to each polygon, you will want to manually correct large gaps between the polygons and use Average to fix smaller gaps.
- Switch to Outline mode (View > Outline). Outline mode allows you to see just the paths underlying your drawing.
- Zoom in and note the areas where the polygons are misaligned.
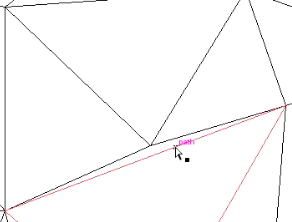
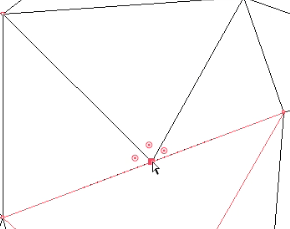
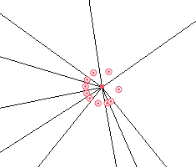
- Use the Direct Selection Tool (A) to fix any large gaps and alignment issues. Zoom in and select the single intersection of multiple points, then drag the points into proper alignment with their corresponding/matching anchor point.
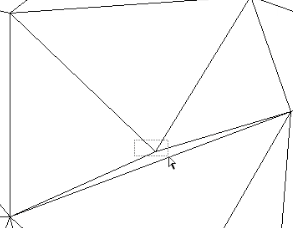
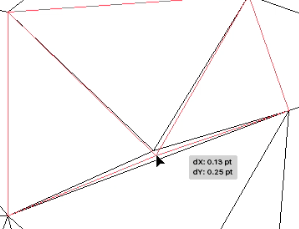
For smaller misalignments…
- Using the Direction Selection Tool (A) select a set of intersecting points, then use Object > Path > Average… (Opt-Cmd/Ctrl-J), choose Both Axis and press Ok. NOTE: If you try to fix too many intersections, you’ll get a great big mess. Undo and either select fewer points, or manually fix things and then apply Average again to fine tune things.

- When the gap corrections are finished, switch back to Preview mode (View > Preview).
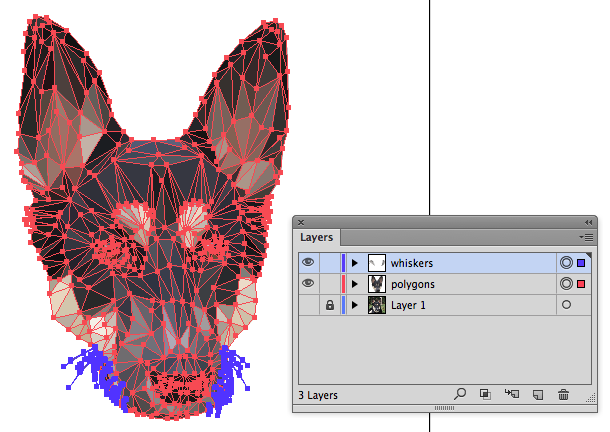
Step 7 – Whiskers
Add whiskers by drawing them with the pen tool and then applying a gradient to each whisker.
- Turn off visibility to the triangle vectors layer.
- On a new layer, use the Pen Tool (P) to draw long, thin shapes that approximate whiskers on the just the left side of the dog’s face. (I think mine turned out more like spider legs, but they did the job.)
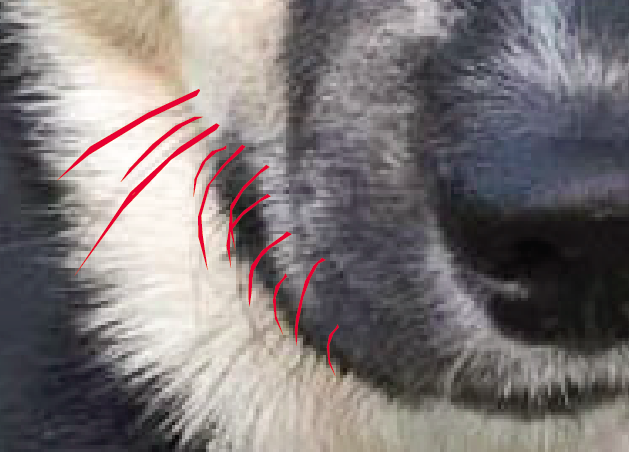
- Select the whiskers and change the fill to a midtone brownish grey and set the stroke to no color.
- Turn on visibility to the triangle vectors layer.
- Adjust and reposition the whiskers.
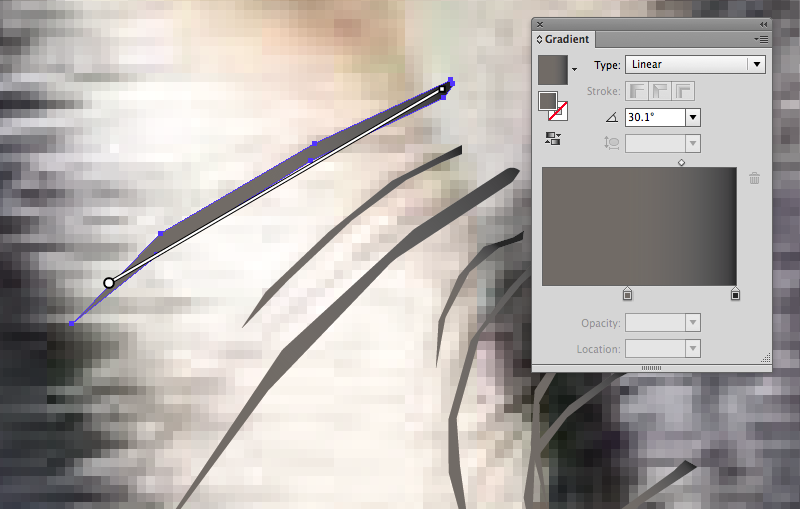
- At this point, you could just leave the whisker colors as they are. I decided to apply a gradient by selecting the whiskers, opening the Gradient panel and creating a linear gradient at zero degrees with black on the right end (nearest the dog’s face) and extending to brownish grey at left end (furthest from the dog’s face).
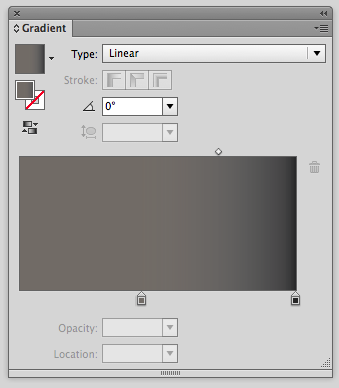
- Use the Direct Selection Tool (A) and the Gradient Tool (G) to select each whisker and customize the gradient angle, length and color positions.
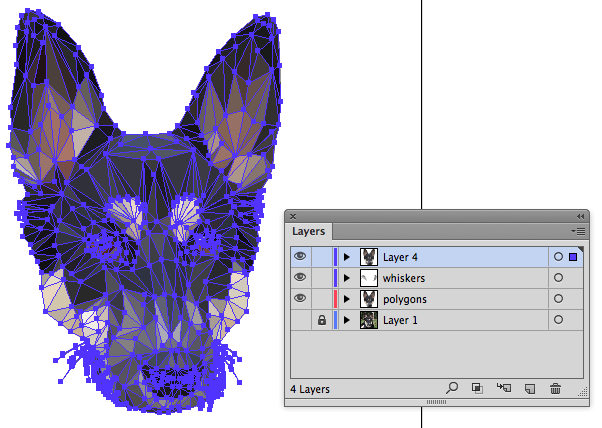
- Once each whisker has been edited, select all and double-click the Reflect Tool (O). * This calls up the Reflect Options dialog. Select Vertical axis and press Copy.
- Move the second set of whiskers to the right side of the dog’s face and make adjustments to the individual whiskers, so that they won’t look like exact replicas of the first set.
Step 8 – Finishing Touches
Add a neutral color behind the low poly art to fill in remaining gaps.
- Turn off visibility to the image that was used to create the low poly illustration.
- Select and Copy the polygons and whiskers layers.
- Paste in Place (Shift-Cmd/Ctrl-V) on a new layer.
- With the duplicate art selected, use the Pathfinder panel (Window > Pathfinder) and press the Unite button to combine the art.
- Use the Shaper Builder Tool (Shift-M) to remove unwanted points from the interior of the united art.
- In the Layers panel, move the cleaned up background art below/behind the polygon and whiskers layers.
- With the background art still selected use the Eyedropper Tool (I) to select a color from the polygon art for use as the background art color. Choose a neutral color that is not too light or too dark. This color will fill in any hairline gaps that still remain between the polygons.
- Once you have selected a color, toggle the layer’s visibility to see the difference the background art color makes. It will look similar to the animation below.
Using Vector Triangulator
Vector Triangulator is a free app (Mac and Windows) that can help you create a polygon object in just a few minutes. You won’t have the precision of working in Illustrator, but the trade off is speed. Vector Triangulator works well with objects that don’t require intricate control over details. The polygon object is saved as coordinates a TXT file that can be opened for further editing in Vector Triangulator. The object can also be exported as a PDF for further editing and color adjustments in Illustrator.
-Learn more about Vector Triangulator-
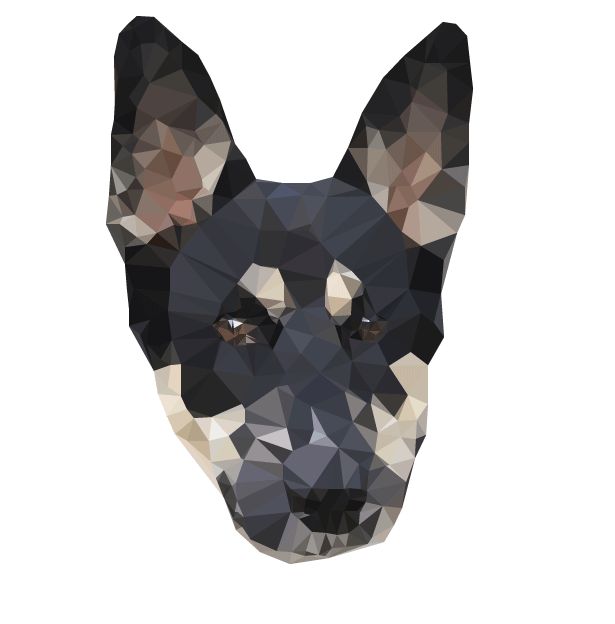
Here’s a Vector Triangulator version of the low poly dog illustration. It took me around 15 minutes to create this art and then clean it up in Illustrator.
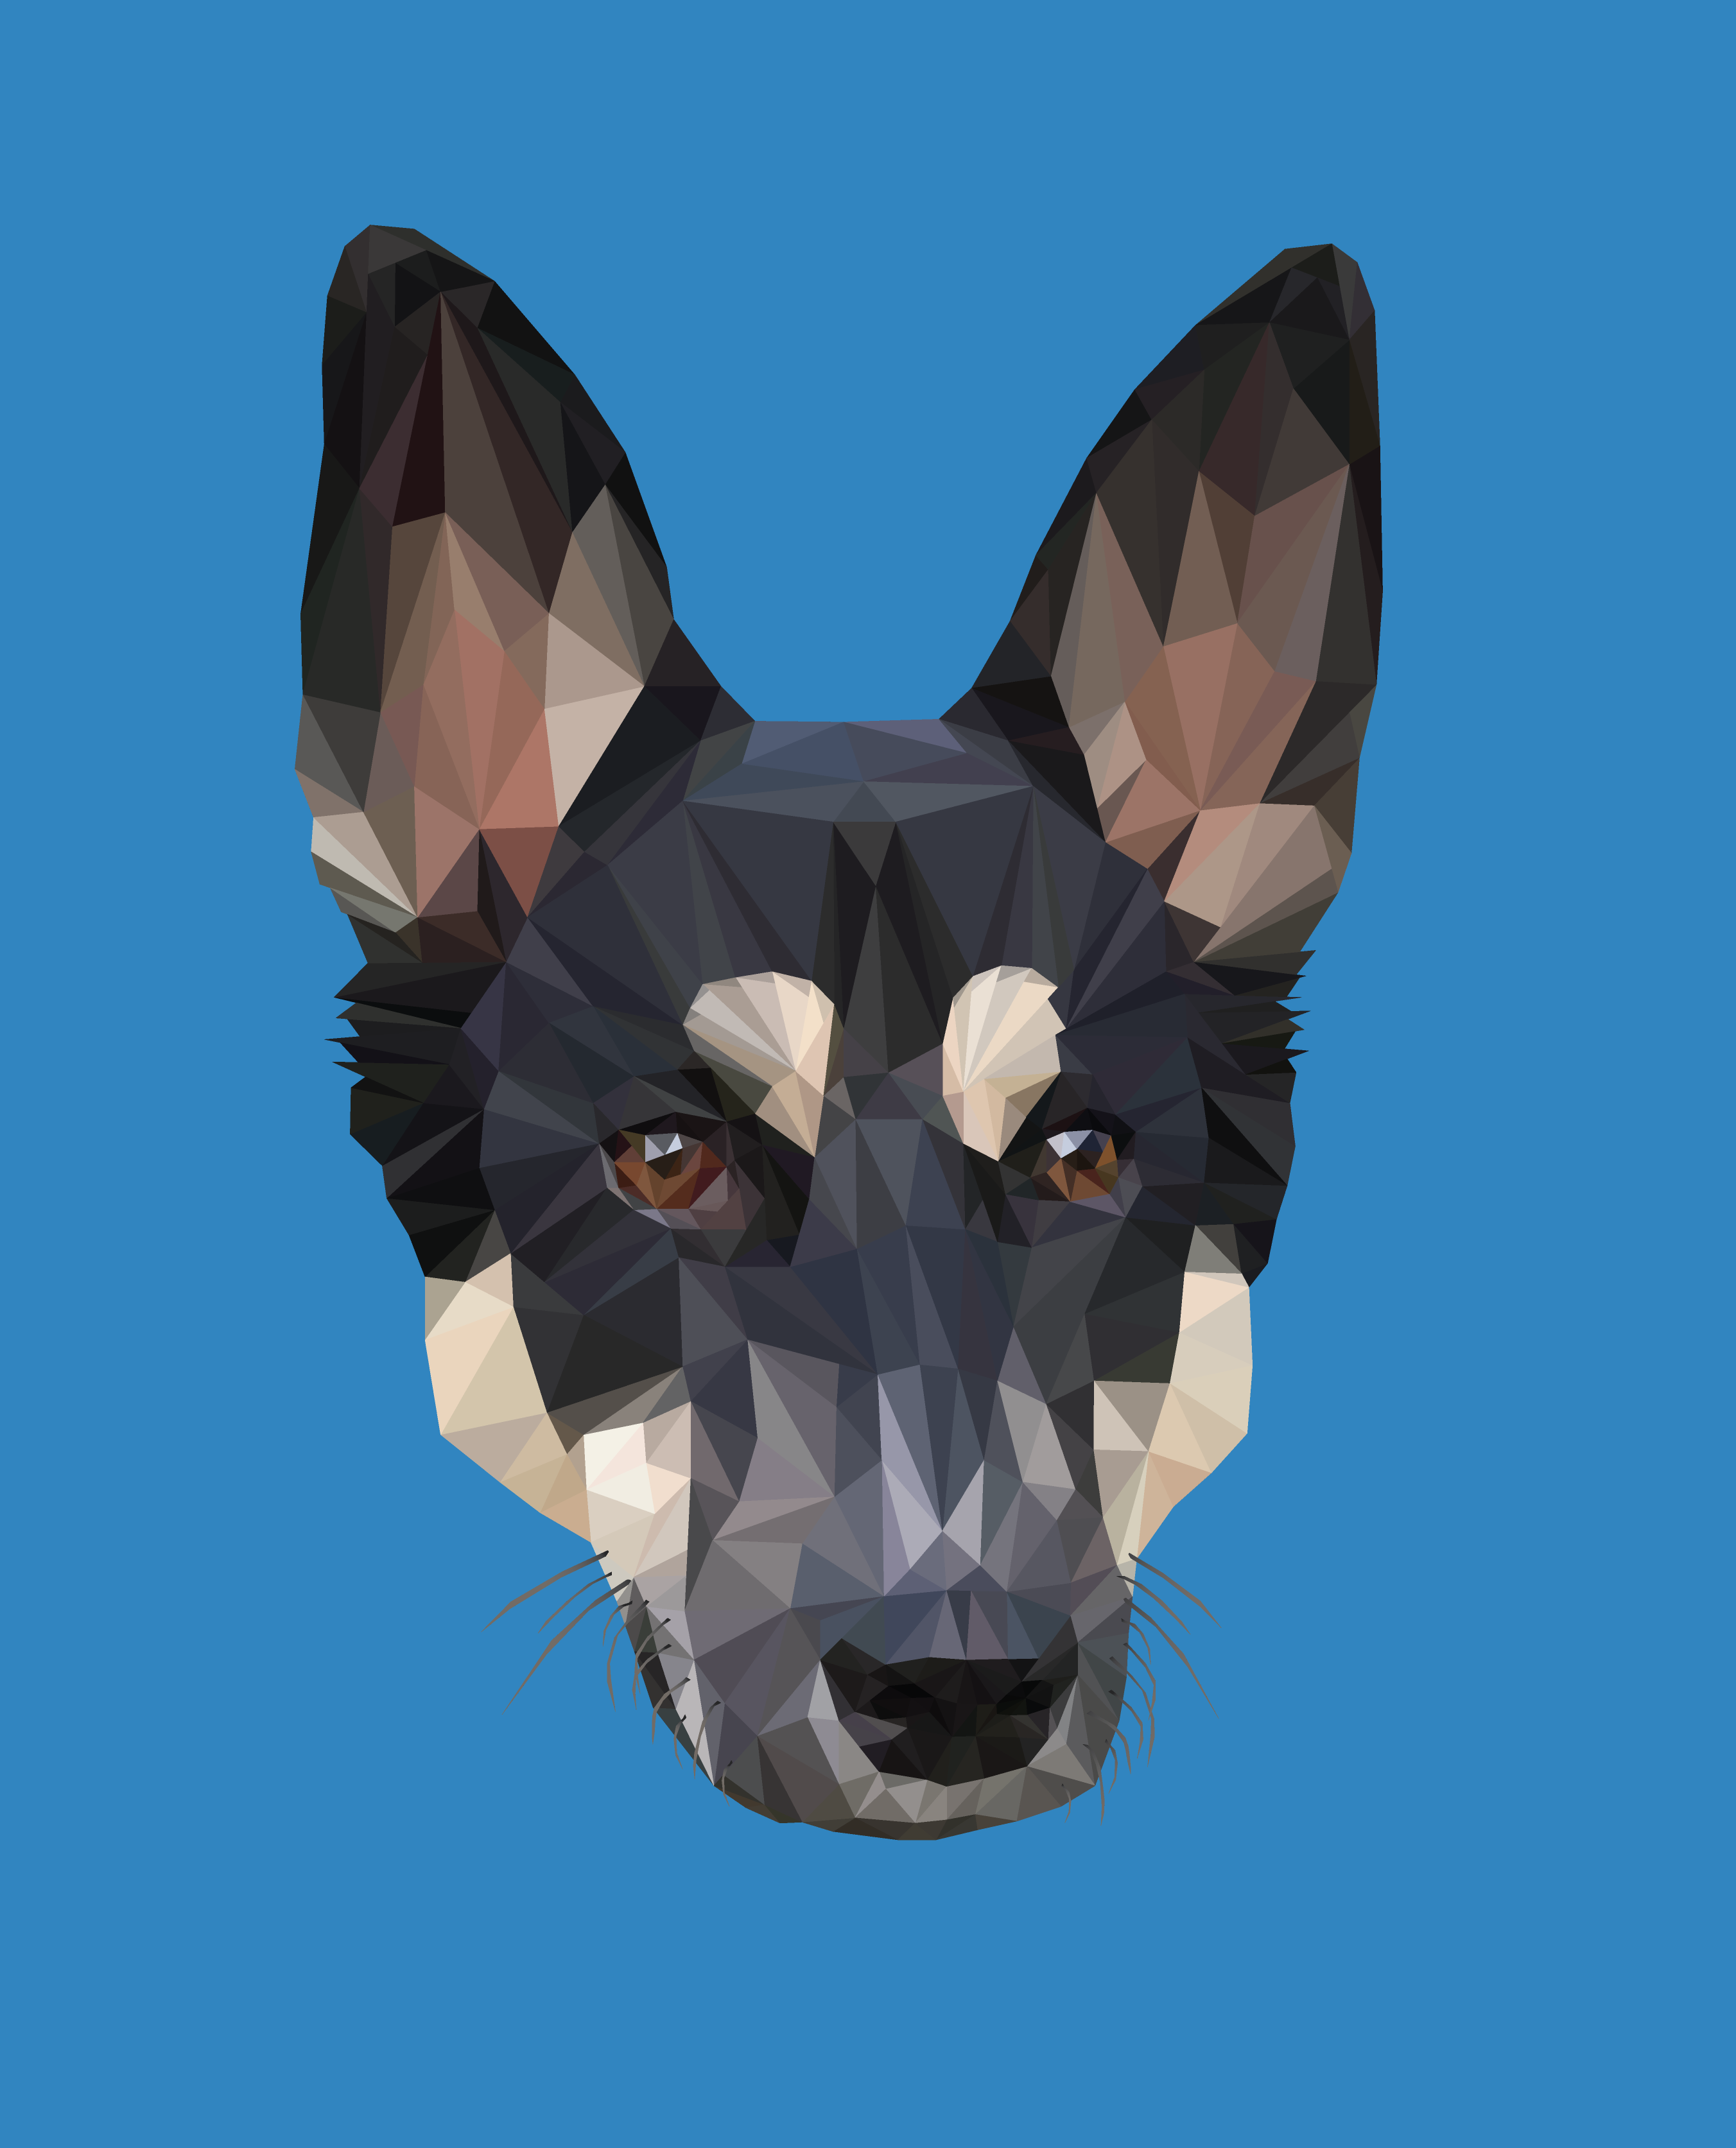
This was fun. It was a challenge to create the right combination of triangles and color to represent a complex subject. Working with polygons has been a great aid in helping me see the basic interaction of light and shadow with shapes and forms. Best of all, I was able to create a really cool illustration!
Visit my artist shop at Society6 to purchase this design as a print, phone case, tapestry or t-shirt.

Really nice clear tutorial, thank you.
You’re welcome! Thanks for the feedback.